Installation
Note: TButt requires Unity 2017.1 or newer.
1. Download TButt
Import the TButt Unity Package into your project:
Download .unitypackage View Full Source
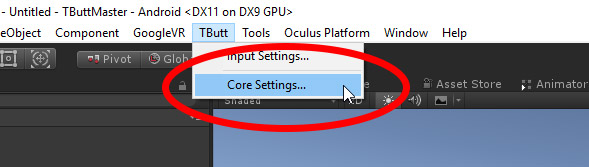
2. Choose Your platforms
In Unity, go to the “TButt” menu on the top menu bar and choose “Core Settings…”. Switch to the tabs of the platforms you want and enable at least one and save your settings.
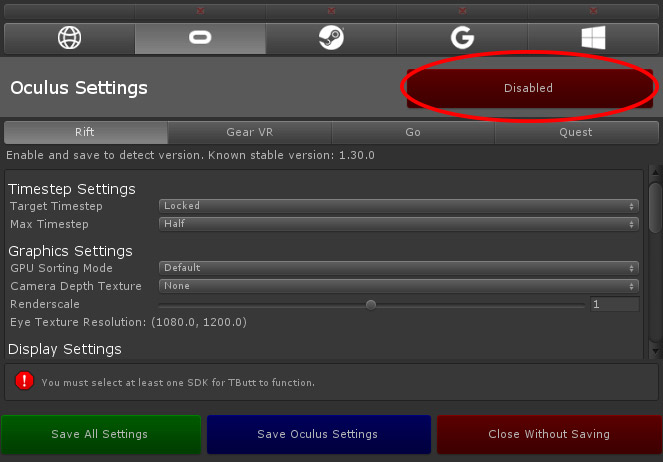
Install SDKs if necessary
If the platform you’ve selected requires an external SDK or plugin to use, you’ll be prompted to download it in the Core Settings menu if TButt doesn’t detect it in your project. The download button in the menu will link to the most recent version that has been tested with TButt (although newer versions may also be compatible).
Note: TButt is not currently compatible with Steam VR Plugin 2.0. Please use version 1.2.3.
Setup Version Control ignores if necessary
TButt will generate a file called “TButtEditorSDKs.json” in the root of your project folder. This file needs to be ignored by version control if you want team members to be working on different platforms at different times.
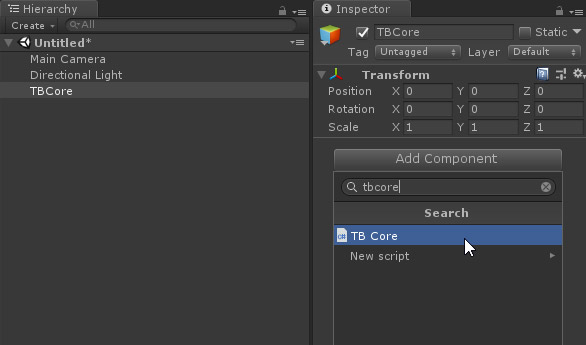
3. Setup a TBCore object
Create an empty GameObject in your scene and add a TBCore script to it. This object can be a prefab and will persist between scenes, but we recommend adding one to every scene (duplicates will be culled during scene changes). For more information, check out the TBCore reference.
4. Read the guide!
We recommend going through each section of this guide to learn how TButt works, as well as some of the things you’ll need to know before integrating it into your project. Click the “Next” button below to continue.